Home > Create and Print Labels Using Your Computer > Create and Print Labels Using P-touch Editor (Windows)
Create and Print Labels Using P-touch Editor (Windows)
To use your Label Printer with your Windows computer, install your model's printer driver and P-touch Editor on your computer.
For the latest drivers and software, go to your model's Downloads page at support.brother.com/downloads.
- Start P-touch Editor
 .
. Click , or double-click the P-touch Editor icon on the desktop.
*Depending on your computer's operating system, the Brother P-touch folder may or may not be created.
- Make sure your model's name is selected on the Home screen.
- Do one of the following:
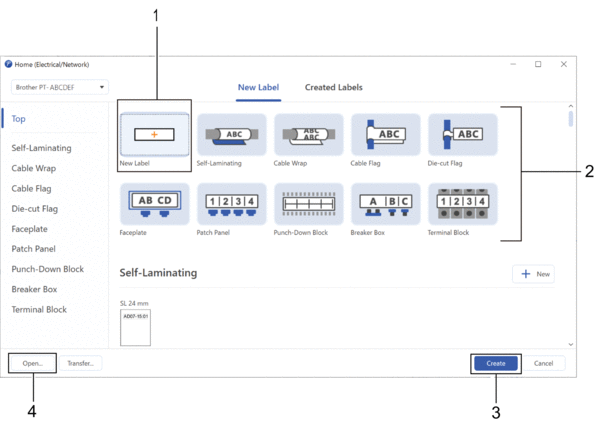
- To create a new layout, click the New Label tab, and then click the New Label button (1).
- To create a new layout using a preset layout, click the New Label tab, and then click a category button (2), select a template, and then click Create (3).
- To open an existing layout, click Open (4).

- Click the Print icon.
- Select the print settings you want, and then click Print.
 To change how P-touch Editor starts, open P-touch Editor and click . Select the Mode option on the left side of the screen, and then select the Home/Office or Electrical/Network option. Click OK to apply the setting.
Did you find the information you needed?


