Home > Troubleshooting > Printer Jam or Paper Jam > Paper is Jammed Inside and in the Multi-purpose Tray (Paper Jam/Jam E Inside/MP)
Paper is Jammed Inside and in the Multi-purpose Tray (Paper Jam/Jam E Inside/MP)
(DCP-T820DW/DCP-T825DW) When using the Multi-purpose (MP) tray, if the LCD displays [Paper Jam], follow these steps:
(MFC-T920DW/MFC-T925DW) If the LCD displays [Jam E Inside/MP] or [Repeat Jam E In/MP], follow these steps:
- Unplug the machine from the AC power outlet.
- IMPORTANT
- (MFC-T920DW/MFC-T925DW)
Before you unplug the machine from the power source, you can transfer your faxes that are stored in the machine's memory to your computer or another fax machine so you will not lose any important messages.
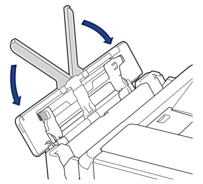
- Remove any paper that is loaded on the MP tray.Place the paper support back into the MP tray cover.
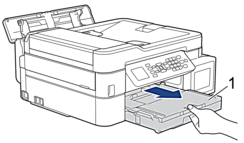
- Pull the paper tray (1) completely out of the machine.
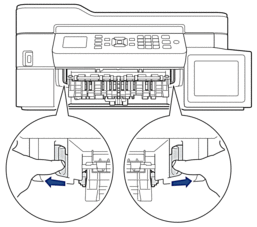
- Pull the two green levers inside the machine to release the jammed paper.
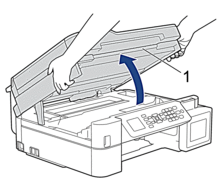
- Place both hands under the plastic tabs on both sides of the machine to lift the scanner cover (1) into the open position.
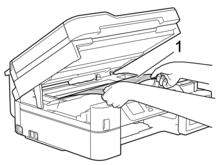
- Slowly pull the jammed paper (1) out of the machine.
- IMPORTANT
-
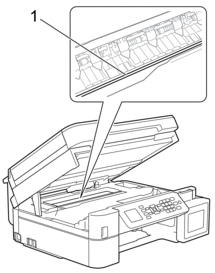
- DO NOT touch the encoder strip, a thin strip of plastic that stretches across the width of the machine (1). Doing this may cause damage to the machine.
- If the print head is in the right corner as shown in the illustration (2), you cannot move it. Follow these steps:
- Close the scanner cover, and then reconnect the power cord.
- Open the scanner cover again, and then press and hold the Detener/Salir (Stop/Exit) button until the print head moves to the center.
- Unplug the machine from the power source and remove the jammed paper.
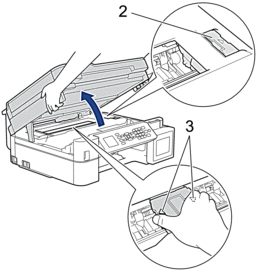
- If the paper is jammed under the print head, unplug the machine from the power source, and then move the print head to remove the paper.
Hold the concave areas with the triangle marks as shown in the illustration (3) to move the print head.
- If ink gets on your skin or clothing, immediately wash it off with soap or detergent.

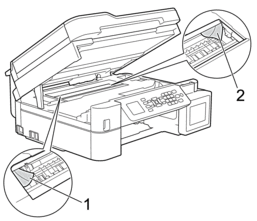
Move the print head (if needed) to remove any paper remaining in this area. Make sure scraps of paper are not left in the corners of the machine (1) and (2).
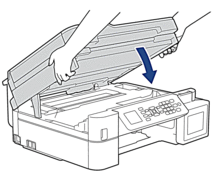
- Gently close the scanner cover using both hands.
- Slowly pull out the jammed paper (1).
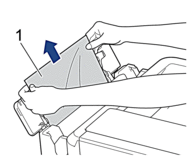

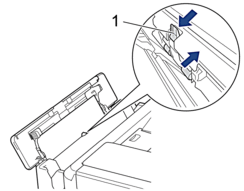
If you are having difficulty pulling paper out, push the release lever (1) toward the back of the machine, and then pull the paper.
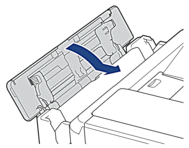
- Close the MP tray cover.
- Push the paper tray firmly back in the machine.
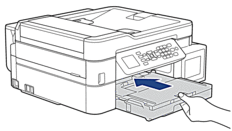
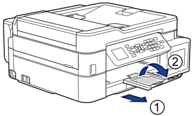
- While holding the paper tray in the machine, pull out the paper support (1) until it locks into place, and then unfold the paper support flap (2).
- Reconnect the power cord.


