Home > Security > Use SSL/TLS > Manage Your Network Machine Securely Using SSL/TLS > Install the Self-signed Certificate for Windows users with Administrator Rights
Install the Self-signed Certificate for Windows users with Administrator Rights
The following steps are for Microsoft Internet Explorer. If you use another web browser, consult the documentation for your web browser to get help with installing certificates.
- Do one of the following:
- Windows 10, Windows Server 2016, and Windows Server 2019
Click .
- Windows 8.1
Right-click the
 (Internet Explorer) icon on the taskbar.
 - Windows Server 2012 and Windows Server 2012 R2
Click
 (Internet Explorer), and then right-click the
  (Internet Explorer) icon that appears on the taskbar.
 - Windows 7 and Windows Server 2008
Click
 .
.
- Right-click Internet Explorer, and then click Run as administrator.
 If the More option appears, click More.If the User Account Control screen appears, click Yes.
 - Type "https://machine's IP address" in your browser's address bar to access your machine (where "machine's IP address" is the machine's IP address or the node name that you assigned for the certificate).
- Click More information.
- Click Go on to the webpage (not recommended).
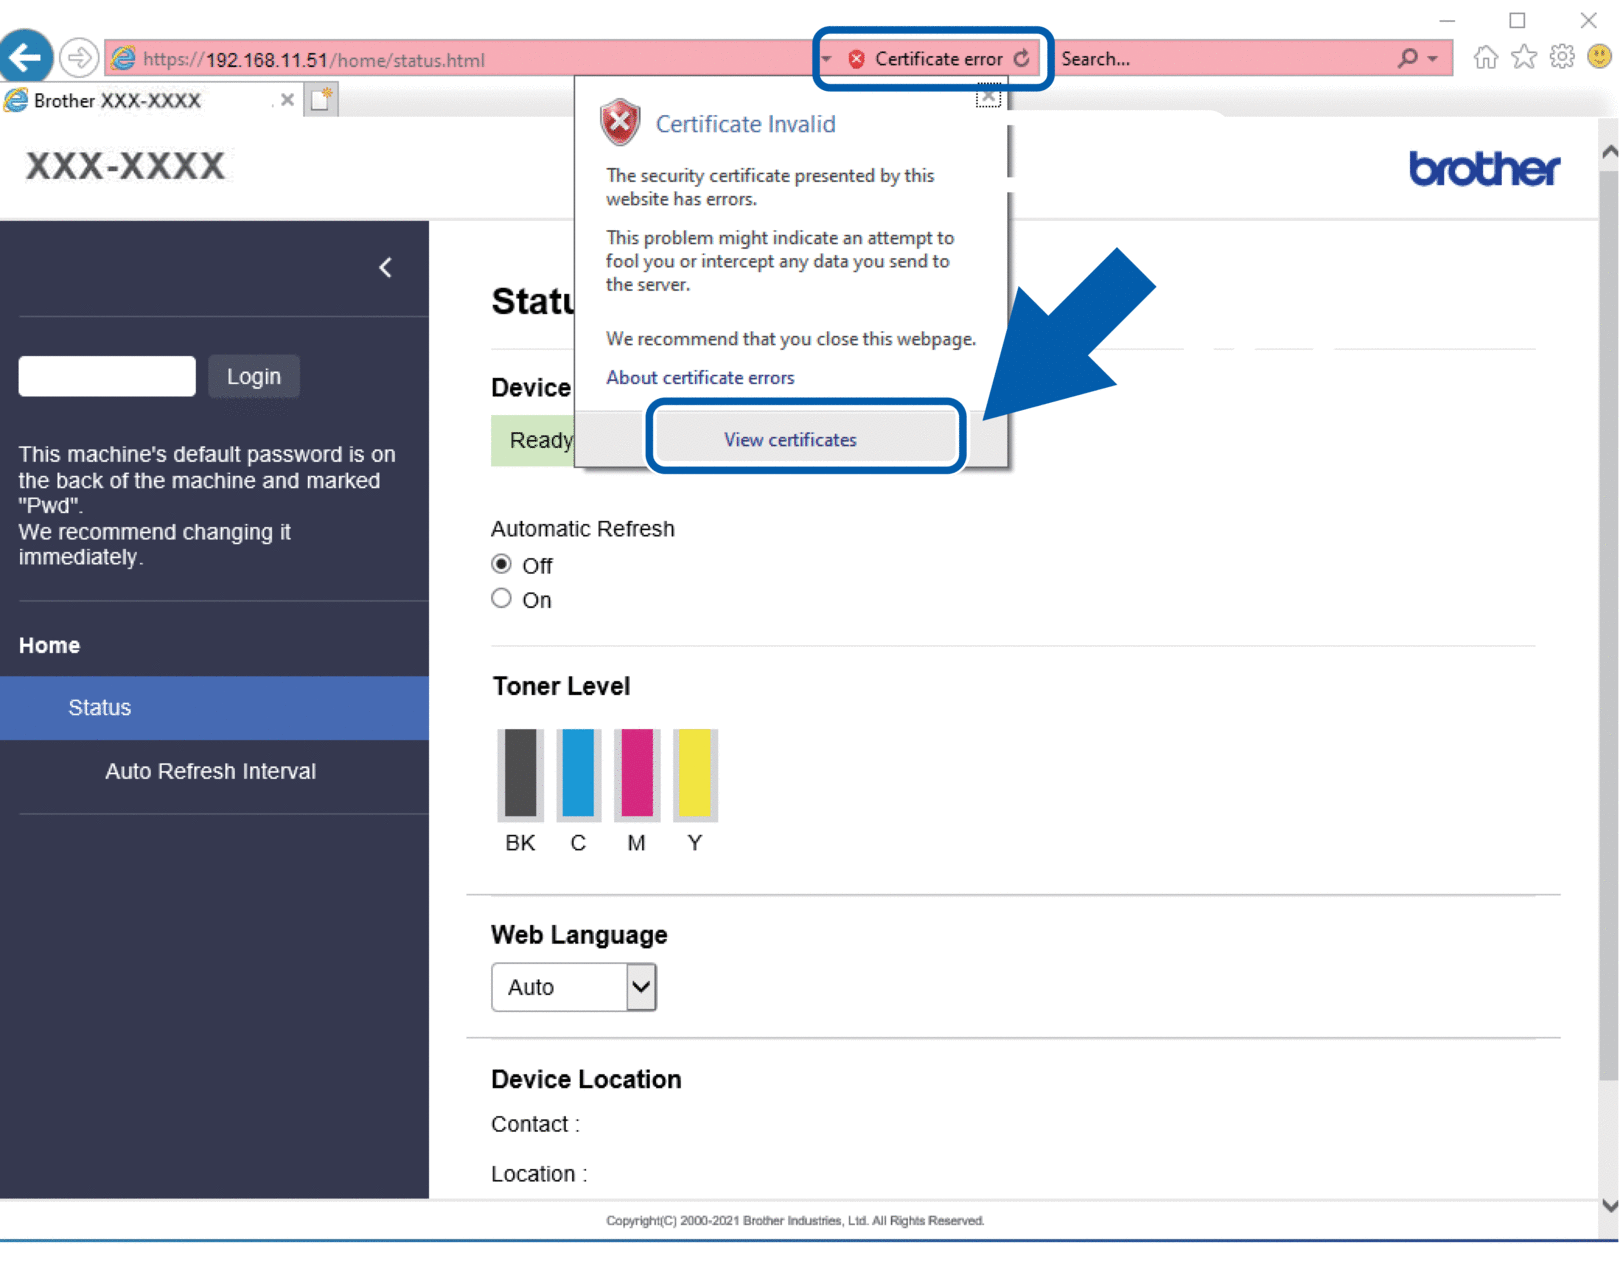
- Click Certificate error, and then click View certificate.

- Click Install Certificate....
- When the Certificate Import Wizard appears, click Next.
- Select Place all certificates in the following store, and then click Browse....
- Select Trusted Root Certification Authorities, and then click OK.
- Click Next.
- Click Finish.
- Click Yes, if the fingerprint (thumbprint) is correct.
- Click OK.
Did you find the information you needed?


