Home > Paper Handling > Load Paper > Load and Print Paper in the Manual Feed Slot > Load and Print on Envelopes in the Manual Feed Slot
Load and Print on Envelopes in the Manual Feed Slot
Before loading, press the corners and sides of the envelopes to make them as flat as possible.
When you load a different paper size in the tray, you must change the Paper Size setting in the machine or on your computer at the same time.
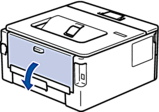
- Open the machine's back cover (the face up output tray).

 The machine automatically turns on Manual Feed mode when you load paper in the manual feed slot.
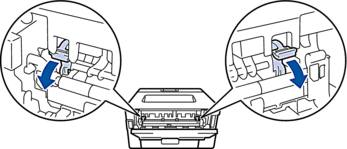
 - Pull down the two green levers, one on the left side and one on the right side, as shown in the illustration.

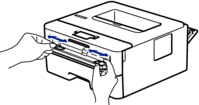
- On the front of the machine, open the manual feed slot cover.

- Use both hands to slide the manual feed slot paper guides to fit the width of the paper that you are using.

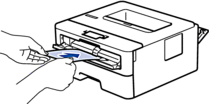
- Using both hands, put one envelope in the manual feed slot until the front edge touches the paper feed roller. When you feel the machine pull it in, let go.


- Load the envelope into the manual feed slot with the printing surface facing up.
- Pull the envelope out completely when you reload the envelope into the manual feed slot.
- Do not put more than one envelope in the manual feed slot at one time, as it may cause a jam.
- Make sure the envelope is straight and in the correct position on the manual feed slot. If it is not, the envelope may not be fed correctly, resulting in a skewed printout or a paper jam.
- Send your print job to the machine.
 Change your print preferences in the Print dialog box before sending the print job from your computer.SettingsOptions for Envelopes
Paper Size
Com-10
DL
C5
Monarch
Media Type
Envelopes
Env. Thick
Env. Thin
- After the printed envelope comes out of the machine, put in the next envelope. Repeat for each envelope that you want to print.
- When you have finished printing, return the two green levers you adjusted in the earlier step back to their original positions.
- Close the back cover (the face up output tray) until it locks in the closed position.
Did you find the information you needed?


