Home > Troubleshooting > Error and Maintenance LED Indications
Error and Maintenance LED Indications
As with any sophisticated office product, errors may occur and supply items may have to be replaced. If this happens, your machine identifies the error or required routine maintenance and the Status Monitor indicates the appropriate message. The most common error and maintenance indications are shown in the table.
Follow the instructions in the Actions to improve the status.
| LED Indication | Status Monitor | Cause | Action |
|---|
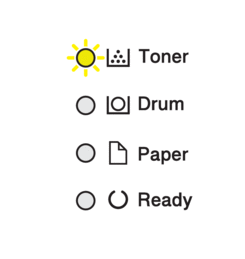 | Cartridge Error | The toner cartridge is not installed correctly. | Remove the toner cartridge and drum unit assembly from the machine. Take out the toner cartridge, and put it back in the drum unit again. Reinstall the toner cartridge and drum unit assembly back in the machine. If the problem continues, contact Brother customer service or your local Brother dealer. |
| No Toner | The toner cartridge or the toner cartridge and drum unit assembly is not installed correctly. | Remove the toner cartridge and drum unit assembly. Remove the toner cartridge from the drum unit, and reinstall the toner cartridge back in the drum unit. Reinstall the toner cartridge and drum unit assembly back in the machine. If the problem continues, replace the toner cartridge with a new one. See Related Information: Replace the Toner Cartridge. |
| Wrong Toner | The installed toner cartridge is not correct for your machine. | Remove the toner cartridge from the drum unit, and install a toner cartridge with the correct supply product code. |
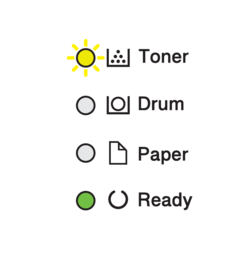 | Toner Low | If the Status Monitor shows Toner Low you can still print; however, the machine is telling you that the toner cartridge is near the end of its life. | Order a new toner cartridge now so a replacement toner cartridge will be available when the Status Monitor displays Replace Toner. |
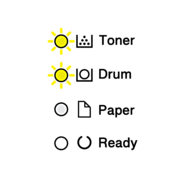 | No Drum Unit | The drum unit is not installed correctly. | Reinstall the toner cartridge and drum unit assembly. See Related Information: Replace the Drum Unit. |
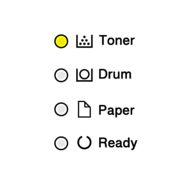 | Replace Toner | The toner cartridge is at the end of its life. | Replace the toner cartridge with a new one. See Related Information: Replace the Toner Cartridge. |
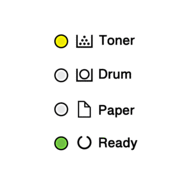 | Replace Toner (Continue Mode) |
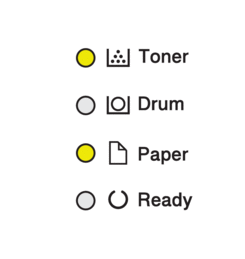 | Toner Ended (Continue Mode) | It is time to replace the toner cartridge. | Replace the toner cartridge with a new one. See Related Information: Replace the Toner Cartridge. |
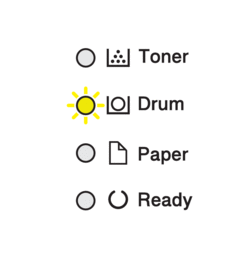 | Drum ! | The corona wire on the drum unit must be cleaned. | Clean the corona wire on the drum unit. See Related Information: Clean the Corona Wire. If the problem continues, replace the drum unit with a new one. |
| The drum unit or the toner cartridge and drum unit assembly is not installed correctly. | Remove the toner cartridge and drum unit assembly. Remove the toner cartridge from the drum unit, and reinstall the toner cartridge back into the drum unit. Reinstall the toner cartridge and drum unit assembly into the machine. If the problem continues, replace the drum unit with a new one. |
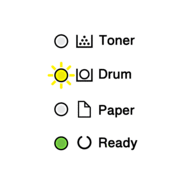 | Drum End Soon | The drum unit is near the end of its life. | Order a new drum unit before the machine displays Replace Drum indication. |
|
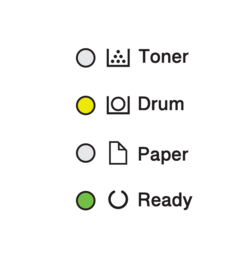 | Replace Drum | It is time to replace the drum unit. | Replace the drum unit with a new one. See Related Information: Replace the Drum Unit. |
| If this message appears after replacing the drum unit, the drum unit counter has not been reset. | Reset the drum unit counter. See Related Information: Reset the Drum Counter. |
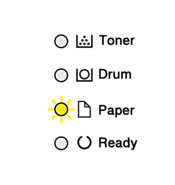 | Cover is Open | The front cover is not completely closed. | Open and then firmly close the front cover of the machine. |
| The fuser cover is not completely closed or paper was jammed in the back of the machine when you turned the power on. |
|
| 2-sided Disabled | The back cover of the machine is not closed completely. | Close the back cover of the machine until it locks in the closed position. |
| The 2-sided tray is not installed completely. | Install the 2-sided tray firmly in the machine. |
| Jam 2-sided | The paper is jammed underneath the 2-sided tray or the fuser unit. | Clear the Jam in the 2-sided tray or the fuser unit. |
| Jam Inside | The paper is jammed inside the machine. | Open the front cover, remove the drum and toner, and clear the paper jam. |
| Jam Rear | The paper is jammed in the back of the machine. | Open the fuser cover and remove all jammed paper. Close the fuser cover. |
| Jam Tray 1 | The paper is jammed in the paper tray. | Pull the paper tray out completely and remove all jammed paper. |
| Out of Memory | The machine's memory is full. | Reduce the print resolution. |
| Size Error DX | The paper size specified in the printer driver is not suitable for automatic 2-sided printing. | Load the correct size of paper in the tray and set the tray for that paper size. The paper size suitable for automatic 2-sided printing is A4. |
| The paper in the tray is not the correct size and is not suitable for automatic 2-sided printing. |
| Size Mismatch | The paper in the tray is not the correct size. | Load the correct size of paper in the tray and set the size of paper to the tray. Press Go. |
| The paper tray you selected does not support the paper size specified in the printer driver. | Change the printer driver setting or the machine's tray setting so that the paper size selected in the printer driver matches the paper size loaded in the tray you selected. |
| Size Error | The paper tray you selected does not support the paper size specified in the printer driver. | Change the printer driver setting or the machine's tray setting so that the paper size selected in the printer driver matches the paper size loaded in the tray you selected. |
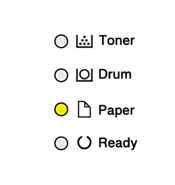 | Manual Feed | Manual was selected as the paper source in the printer driver, but there is no paper in the manual feed slot. | Place paper in the manual feed slot. |
| No Paper T1 | The machine is out of paper, or paper is not loaded correctly in the paper trays. |
|
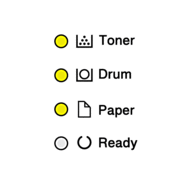 | Cannot Print | The machine has a mechanical problem. | Press and hold |
 | Self-Diagnostic | The fuser unit does not work correctly. | Press and hold |
| The fuser unit is too hot. |
| Cannot Print | The machine has a mechanical problem. |
|


